All 8 Nightlords Guide — Elden Ring Nightreign Boss Strategy
General rule: Always check the Nightlord weakness icon on the expedition select screen and bring a Relic that adds the matching status (bleed/frost/holy/lightning).
Quick-Reference Table
Section titled “Quick-Reference Table”| # | Nightlord | Weakness | Resistance | Difficulty | Theme |
|---|---|---|---|---|---|
| 1 | Gladius, Beast of Night | Holy | Fire | ★★★☆☆ | Three-headed beast with chain sword |
| 2 | Adel, Baron of Night | Poison | — | ★★★★☆ | Crushing Jaws |
| 3 | Gnoster, Wisdom of Night | — | — | ★★★★☆ | Insect of insight |
| 4 | Maris, Fathom of Night (Augur) | Lightning | — | ★★★★☆ | Deep-sea omen, spawns minions |
| 5 | Libra, Beast of Balance | — | — | ★★★★☆ | Balance Law monster |
| 6 | Fulgor, Knight of Night (Balancers) | Bleed | — | ★★★☆☆ | Bull-like, easy with bleed |
| 7 | Caligo, Mist of Night | Fire + Bleed | — | ★★★★☆ | Frost dragon |
| 8 | Heolstor the Nightlord (Final) | Holy | — | ★★★★★ | Final boss, dual HP bar, 4 elements |
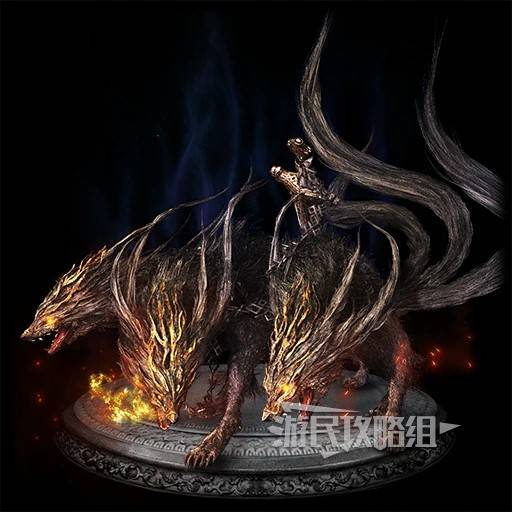
1. Gladius, Beast of Night (First Nightlord)
Section titled “1. Gladius, Beast of Night (First Nightlord)”Recommended team: Executor + Raider + Ironeye
Phase 1: Solo boss with heavy chain-sword smashes. When the chain rises high and slows down, roll in the direction of swing. Executor with bleed melts this phase in ~5 minutes.
Phase 2: Splits into 3 clones. Watch for the red circle marker — all clones focus that player. Other two teammates burst freely. Use Ultimates to interrupt and push to Phase 3.
Phase 3: Clones merge. New fire skills (sweeping flame, three-headed fire breath) — roll toward the attack direction. Boss occasionally becomes a fireball (untargetable) — wait for body to reform.
Core tactic: Stay close to body. Long-range chase wastes too much time.
2. Adel, Baron of Night
Section titled “2. Adel, Baron of Night”Key insight: Bring poison weapons — can clear Phase 1 with no flask usage.
6. Fulgor, Knight of Night (Easiest Nightlord)
Section titled “6. Fulgor, Knight of Night (Easiest Nightlord)”Bull-shaped giant boss. Weak to persistent damage — bleed stacks shred it. Easiest of all 8, recommended as your “test new builds” boss.
7. Caligo, Mist of Night (Frost Dragon)
Section titled “7. Caligo, Mist of Night (Frost Dragon)”Weak to fire + bleed. Aggressive team can melt it surprisingly fast.
8. Heolstor the Nightlord (Final Boss)
Section titled “8. Heolstor the Nightlord (Final Boss)”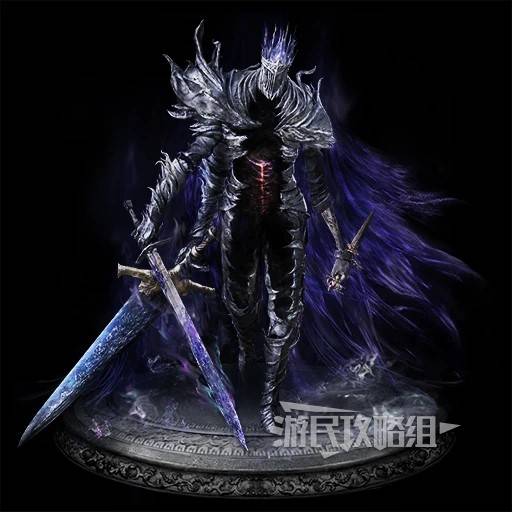
Weakness: Holy | Unlock: Complete other 7 Nightlords first | Workaround: An already-unlocked friend can invite you direct.
Phase 1
Section titled “Phase 1”- Misleadingly tame — mostly melee combos. Use this phase to learn his attack patterns.
- Every swing and thrust is a preview of Phase 2 mechanics.
- Save flasks and Ultimates — Phase 2 doesn’t reset resources but demands more.
- Stay close to extend his attack windups.
- Bring varied element Relics, especially Holy for slight defense reduction.
Phase 2
Section titled “Phase 2”- Second HP bar starts. Boss absorbs 4 elements rotating every 25% HP.
- Each attack leaves a persistent elemental damage zone on the ground.
- MUST roll forward / sideways — backwards roll guarantees death in the zone.
- At 75% / 50% / 25% HP, boss launches into the air for a one-shot kill. Sprint to the arena edge when you see liftoff.
Three-Step Principle
Section titled “Three-Step Principle”Identify element transition → Avoid persistent zones → Burst during cooldown
Team Roles
Section titled “Team Roles”- Raider: Hold Ultimate until element transition (key buff + shield)
- Ironeye: Hold Ultimate for revives, especially post one-shot
- Executor: Full DPS during cooldown windows
Post-Victory
Section titled “Post-Victory”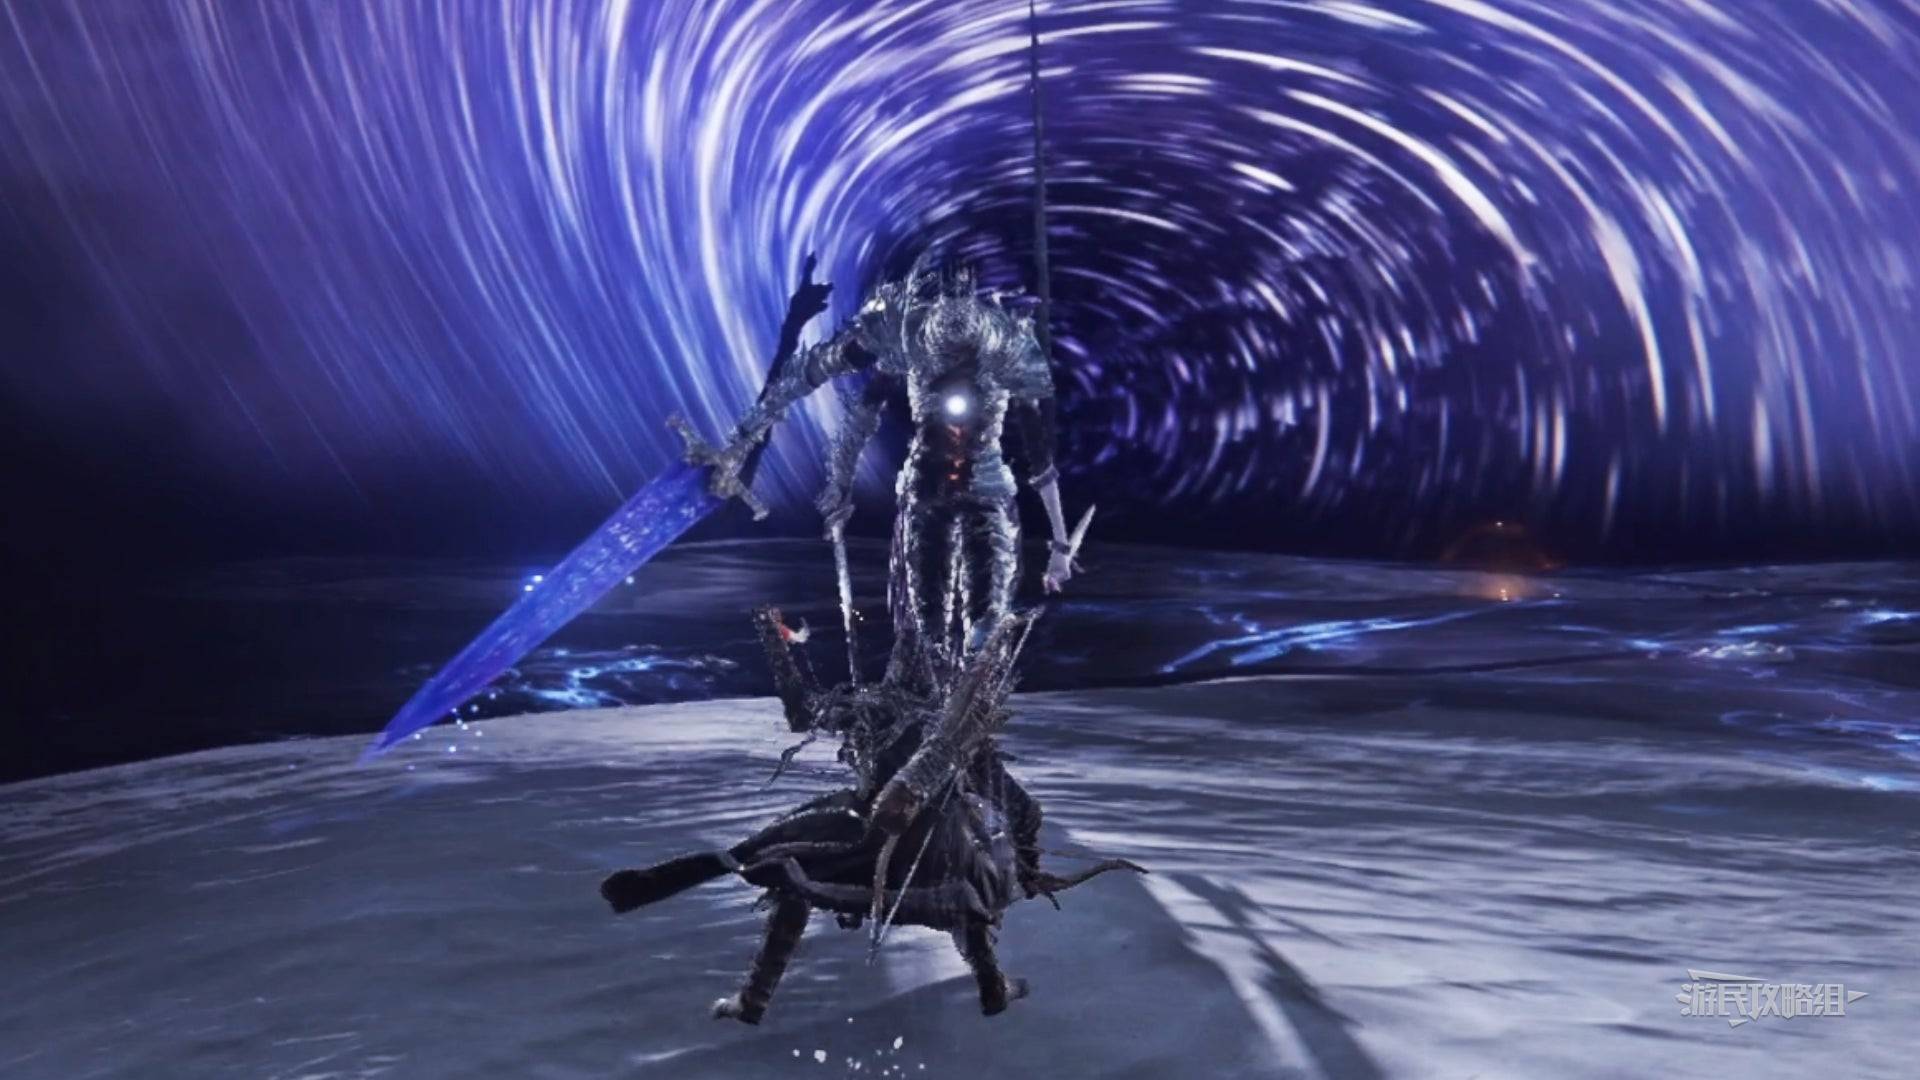
Each player enters their own Roundtable Hold. Talk to the NPC at cliff edge to trigger the ending cutscene. Unlocks final outfits in dressing room and the last Vessel at the Pot Merchant shop.
Solo vs Trio Difficulty
Section titled “Solo vs Trio Difficulty”Trio: Recommended. Single-player makes bosses ~2x harder due to no aggro distribution.
Solo: Enemy HP reduced to ~43%, aggression lowered, but bosses don’t scale down enough to match solo. Use “Dew of the Night” item (2 uses per expedition) for emergency revives.
Q: In what order should I tackle the 8 Nightlords? A: 1 → 6 → 7 → 2 → 3 → 4 → 5 → 8 (Heolstor). Start with easier, leave Heolstor for last.
Q: How do I see which Nightlord is which on the select screen? A: Each has a unique icon. Hover for elemental weakness display.
Q: Can I cheese Heolstor? A: Friend invite bypass is the main “cheese”. No reliable solo cheese exists.